Schedule Reels on Instagram
Learn how to post and schedule your IG Reels with Planoly
Instagram Reels can have a HUGE impact on your engagement and growth on Instagram, but they can also *feel* the most labor-intensive content to create and post (but I can show you how to make them easier!). The only way to preplan Instagram Reels inside of the Instagram app is to use the “Drafts” feature, but I don’t recommend that for two reasons:
- If you update your app, you will lose all your drafts.
2. I don’t trust Instagram because it glitches all. the. time.
However, you can use the Starter Planoly plan* ($11.25/mo) to schedule your Reels. There is no autoposting, but everything can be done ahead of time (cover image and caption included) and stored and scheduled so you get a push notification on your phone.
*Note: I’ve included my affiliate link for Planoly in this post which means I get a small kick back if you choose to sign up using my link. I only ever recommend stuff that I’ve thoroughly tested and use in my own business.
Why Planoly?
We use Planoly* for all of our done-for-you Instagram management clients. I’ve tested out and tried nearly every Instagram planning app out there (Later, Plann, Hootsuite, Facebook Business Manager) and Planoly continues to be the one I return to and recommend because it is the easiest to use (we think!).
Its features include saved hashtag groups, tagging location, auto-posting to your feed, and scheduling Stories (though we never use this feature as I think Stories should be in the moment). Plus they are one of the few Instagram Scheduling apps that allows you to pre-schedule Reels which allows you to batch your content creation.
How to Create and Schedule Reels in Planoly
- Film a simple video like this or film a video of you talking using my 3 Things Framework (you can learn all about the 3 things framework and swipe my process in this blog post).
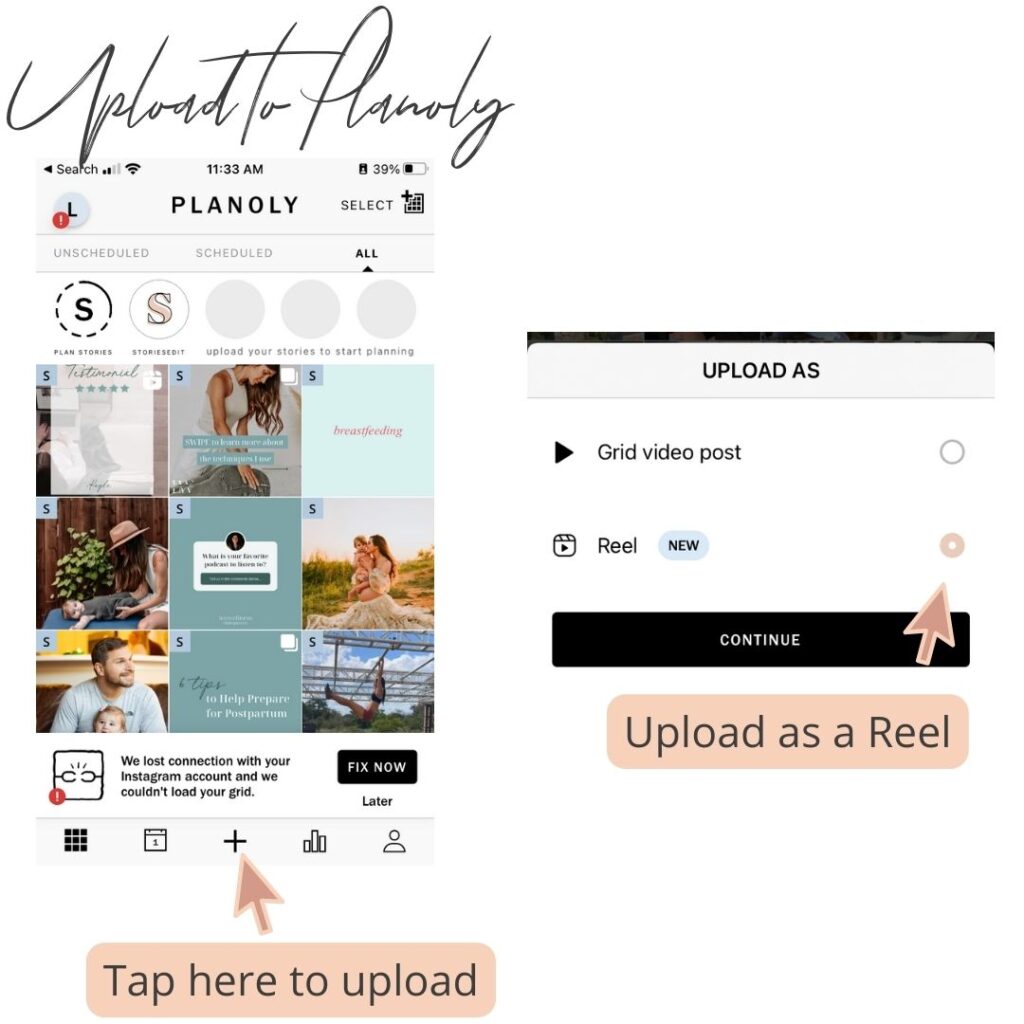
- Upload the video to the Planoly app and choose “Reel” not “Grid Post”
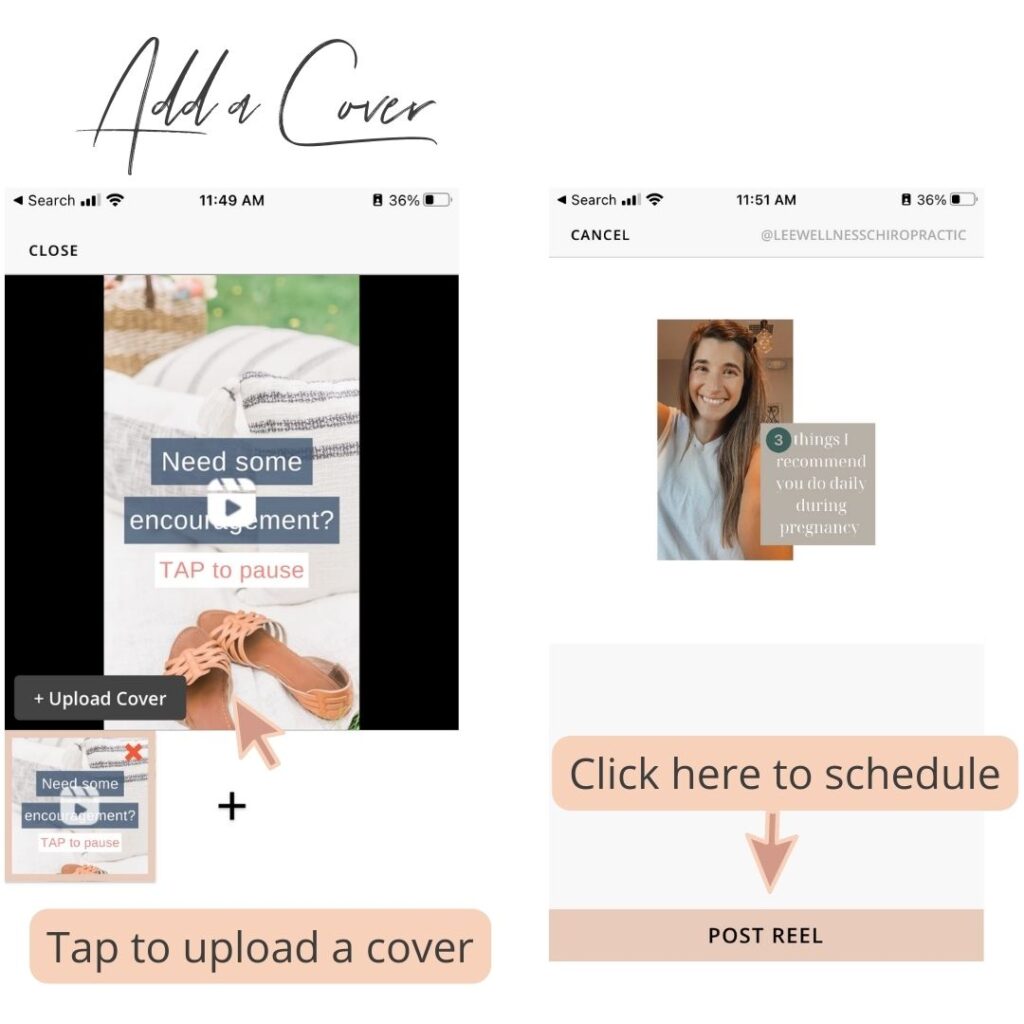
- From here, you can also add a custom cover image. I recommend doing this because it helps users easily peruse your feed for content they want or need.
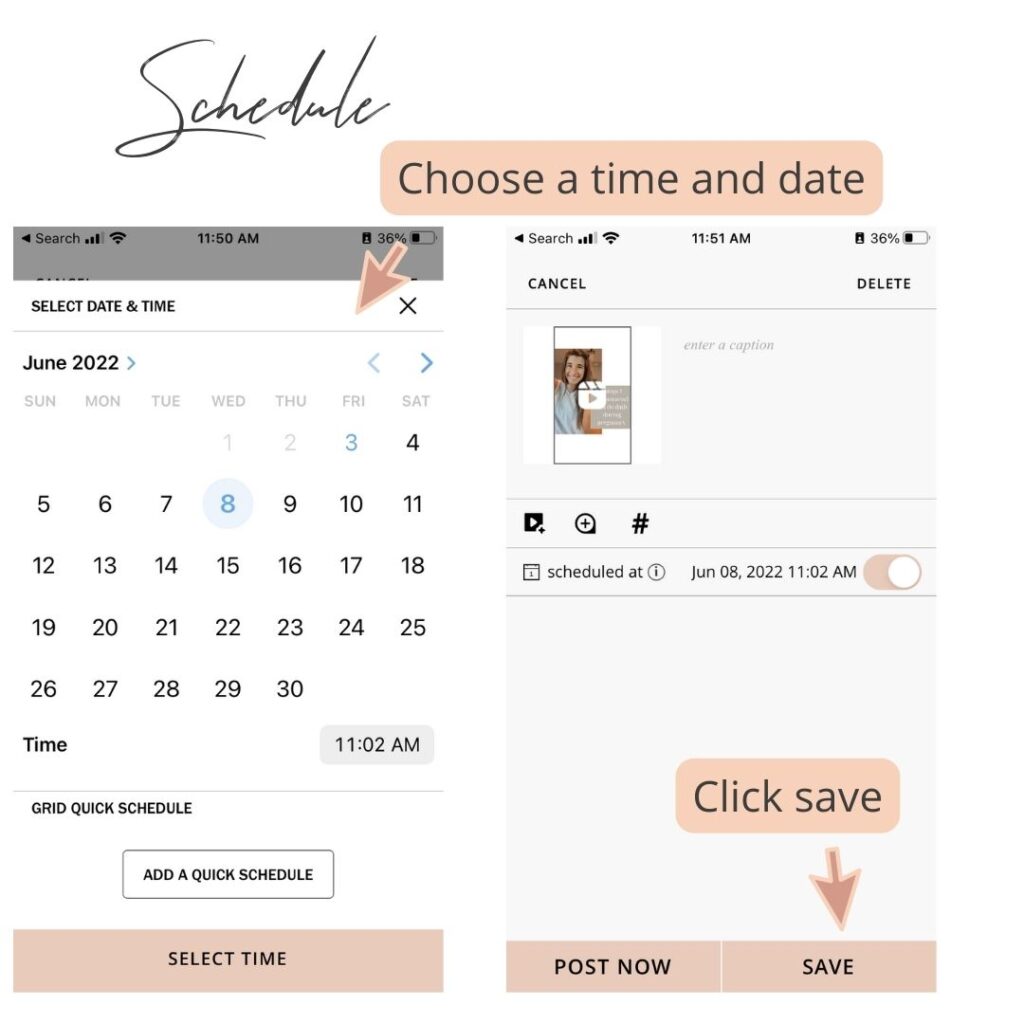
- Schedule the Reel to post on a future date
How to Post Reels from Planoly
- When it’s time to post, go to the Planoly app and find the Reel.
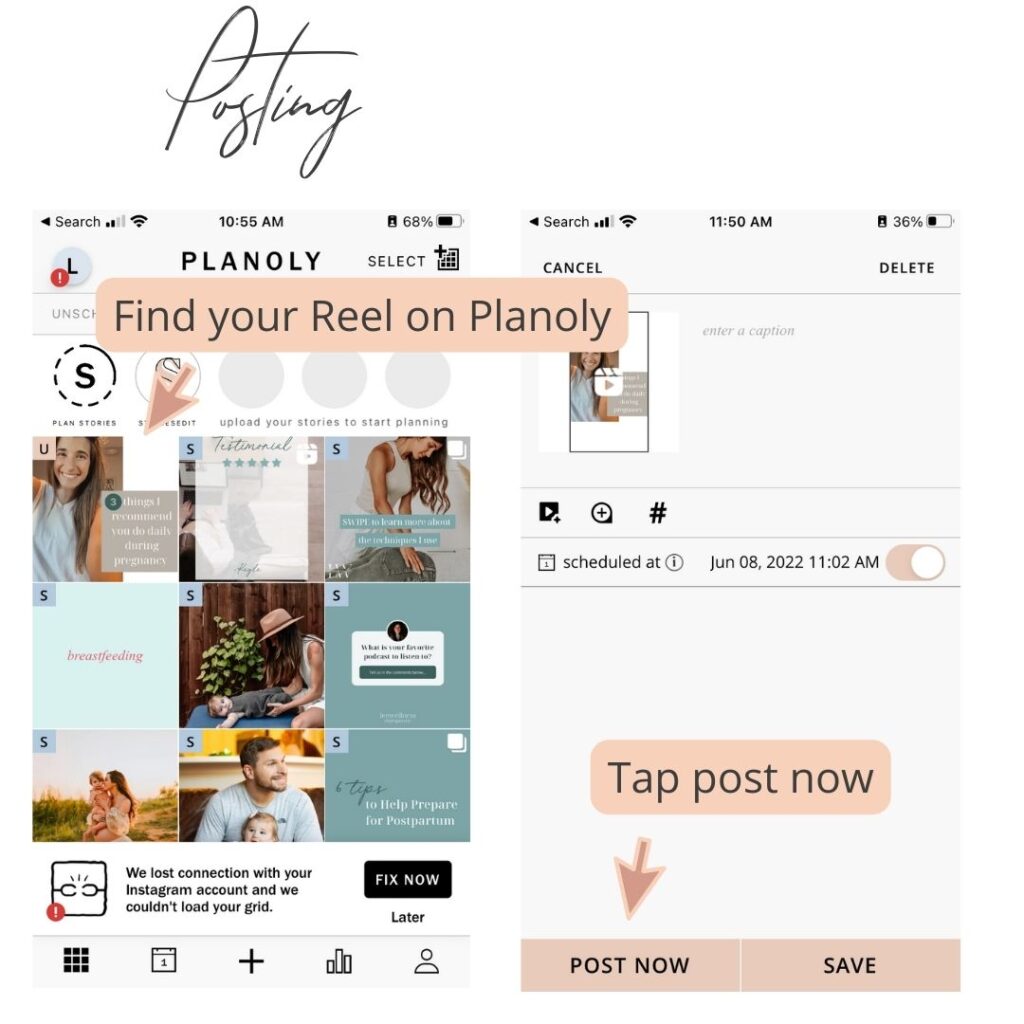
2. Tap post now and then “post Reel”
3. If you have a cover image for your Reel, Planoly will automatically add two different files to your phone’s camera roll- the video/Reel itself and the cover image. Select the video portion ONLY (not both, just the video) and click add in the top right corner
4. If you are going to be adding music to the background, tap the little music icon at the top and select your music. This post shows you how to turn the music down to background music so you can still hear yourself talking or your video’s audio. This post shows you how to harness the power of trending/viral Reels audio without actually doing the trend! (If you don’t want music hit done.)
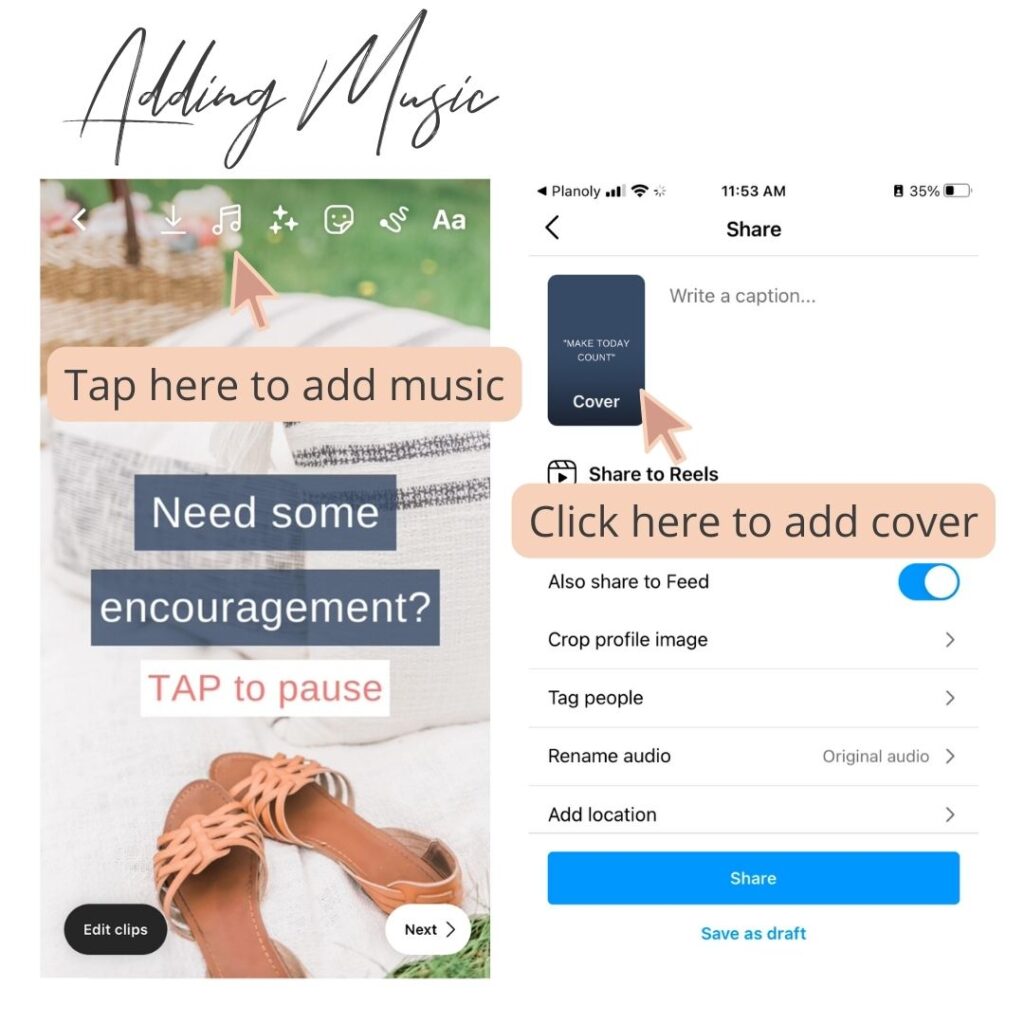
5. To add a custom cover image, tap Then go to the bottom and tap “add from camera roll” and select your cover image.
6. Hit next and this is the part where it starts to get a little tricky. Watch the video above to see exactly what to do.
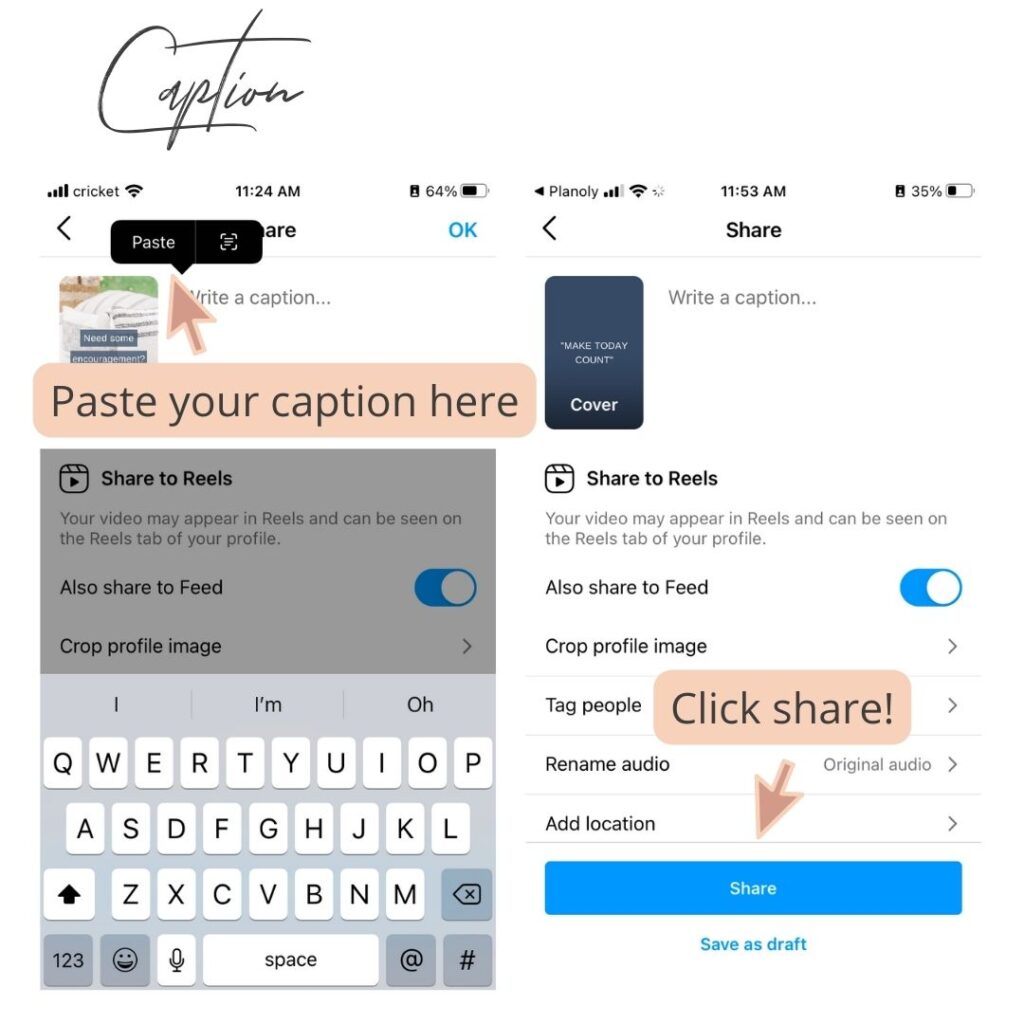
7. For the caption (under the Reel- not the text blurbs that pop up ON your Reel), hold your finger down in the caption field and hit “Paste”. Planoly automatically copies whatever was stored as your Reel’s caption to your phone’s clipboard.
8. Tap done on the top right and that’s it! You’re all set!
If you get stuck or want help click here to send me a DM @mollyacahill